Hey everyone! It's been a wild week here in Florida... Lots of rain and hurricane-force winds have been accompanying this week's workload.
Thankfully, I have stayed safe and, more importantly, my family has too. It has been a crazy week, but doing art with my cat and dogs has given me a burst of motivation!
So, what have I been working on? Let's show, not tell!
So, for these pictures, I went for more of a minimalist style, as reference to the Pinterest artists we had to pull from.
The artist I ended up choosing can be found here. The artist's name is Eyvind Earle and I really liked the way he did water in his work. So, I wanted to draw a car by the sea as my subject.
I also included the speedpaint, for anyone that may be interested.
Well, that would conclude my assignment right?
Wrong!
I did another drawing, just for the heck of it. Not much else you can do during a hurricane besides hunker down and draw. And draw I did! I'm really proud of this drawing!
So I referenced a picture, the ending shot from Yoroshiku Mechadoc's ending. I really love the lighting and perspective in the picture, so I wanted to try my hand at recreating it.
I also included a speedpaint of this one, too!
As you can see, there are a lot of different elements at play in this image. I also really liked the cross and rule of thirds perspective, hence why I chose it as my picture!
While my first image had the rule of thirds and golden rule going on, I think this one really does something interesting with the perspective. I'm so happy I challenged myself to draw this!
But yeah, that's my art for this week! Rain or shine, I'm here to get work done!
Anyways, see you later! I hope you were able to weather Hurricane Ian!
This week has been nothing short of eventful... From hurricanes to family fun, I've been a bit busy.
But don't worry, as usual, I've found time to make time for my art, which is invaluable to me! I'm so happy to have worked on this proxy model.
Although it isn't everything I hoped and dreamed it would be, I'm happy I at least was able to make something. I would like to pursue my initial vision somewhere down the line (maybe this week!).
Well, you're here for my model, not my artistic goals! I can ramble as much as I want, but lemme drop some beauty shots here for you. I'll start with one from Maya!
This is the first screenshot I have ever rendered with Arnold and I think it looks pretty decent! There is some pixilation on some of the boards, which I'm not sure how to remedy, but overall, it looks nice!
This render looks a little cleaner, but it might just be the angle. The weird pixilation is gone, though. And it looks really nice!
I was initially hoping to make a Weighted Storage Cube from Portal, but time got away from me. I was learning how to rig for another assignment, which proved to be a greater challenge than I'd initially anticipated. Oh well, at least I gave both of them my best!
Here's a moodier shot of the crate. I like this one because you can see the details a bit better. I had to make the boards thicker than I'd initially wanted because in some of the progress proxies, there were no textures whatsoever on them. They must have been too thin. Oh well, that's what proxies are for, after all!
Here's a progress shot of some of my proxies! I just thought this looked cool. I really dig this texture from the Unreal Starter Content.
Speaking of that texture... I took my love for it to the next level with this artsier shot.
Same environment... Different lighting! I really like the atmosphere in this one. It reminds me of a dance club in the 1990s... My, that's awfully specific.
Speaking of lighting... Here's some interesting lighting from my product shot round!
Here are my boxes with harsher lighting on them, so you can better see all of the fine, fine boxy details. I can taste the splinters! Ouch!
Speaking of lighting, here's a last beauty shot for ya! This one was taken with the standard Maya renderer and it looks really washed out. But, it's nice for looking at the details! Of which there are many!
But yeah! That was my assignment for this week. I definitely learned a lot about modelling and fighting with Maya from this project. Since we have more time to elaborate on this project in the future, I will be looking forward to readjusting this model for the next round.
I actually ended up having to rebuild this whole thing three times, simply because my materials weren't showing up. In addition, my grid snapping has never snapped properly, so I lovingly hand-placed every single board. You're welcome.
In all seriousness, despite some technical limitations, I think this project went pretty smoothly. I learned a lot of new tricks about extrusion and beveling. In addition, I also got a crash course in UVs, which I will need to revisit in the future.
I definitely was struggling with how to unwrap and cut the UVs and ultimately ended up just utilizing the default and auto layouts. I will be using those in the future until I gather my bearings. If anyone has any suggestions or tips for UV wrapping, I would love to hear them. I'm so lost when it comes to those!
But anyway, enough rambling from me! I'm gonna go submit this and keep watching Hurricane Ian, which may or may not be hitting my hometown.
What a busy week it has been! I have been hard at work on my portfolio and assignment work. I'm excited to share several new pieces with you today!
So, I did the standard "three-point" lighting assignment, with the shapes and infinity wall. However, the JDM tuner inside of me was not quite satisfied with shapes, so I decided to draw one of my favorite cars- the Sileighty (a JDM fusion of the Nissan S180 and Silvia).
So, first things first... Let's go ahead and check out the shapes!
I've never drawn anything like this before, so I'm happy with how it turned out. It's not the most perfect recreation, but it's as close as I could get, so I'm pretty happy! I especially like how the sphere on the right turned out! I spent awhile on it and it looks really good! I also like the luminosity on the shapes- I hope I did the Emissive Lights justice.
Speaking of that, why don't I show you the reference image?
Again, my drawing is by no means a perfect recreation of the HD Screenshot I took in Unreal, but I'm happy with the materials I captured and the lighting sources I emulated. I still have a lot to learn about reflection, but I'm getting better with each drawing. That's all I can ask for!
Now, in case you were wondering, yes I am going to post pictures of the car I drew. I'm very happy with how they turned out. I'm much more comfortable drawing cars and organic lifeforms (two completely different things) than I am shapes.
Here's my initial drawing! I would have just drawn the toy instead of the shapes but...
I wanted to challenge myself and
I wanted to do the assignment correctly
I didn't have access to three point lighting. I just had my flashlight on my phone!
So yes, I do like the way the car turned out a lot more than the shapes, but I wanted to challenge myself too. That's what being a student is all about- trying new things and doing them to the best of my abilities!
But I didn't want to stop there. Instead, I was having so much fun drawing cars, I drew another. Erm, well, it's the same car. Just from a different angle.
I had a little more trouble with this one since I don't usually draw cars from the back, but I'm really really happy with how this looks!
I worked hard on the lighting and shading and came out with something I'm really proud of.
But, I'm a glutton for punishment, so I gave myself a final challenge... To emulate the Initial D light trails and headlight beams in my drawing. And also to give this little car some JDM flair.
I had so much fun drawing this! You have no idea (or maybe you do!). I'm actually really happy with how this turned out. So much so, that I actually took a video of the painting process!
So, spoiler alert (obvious car joke), but I did include some of my references in the video. I'm going to post them below so you can see the photos I worked with to make the magic happen!
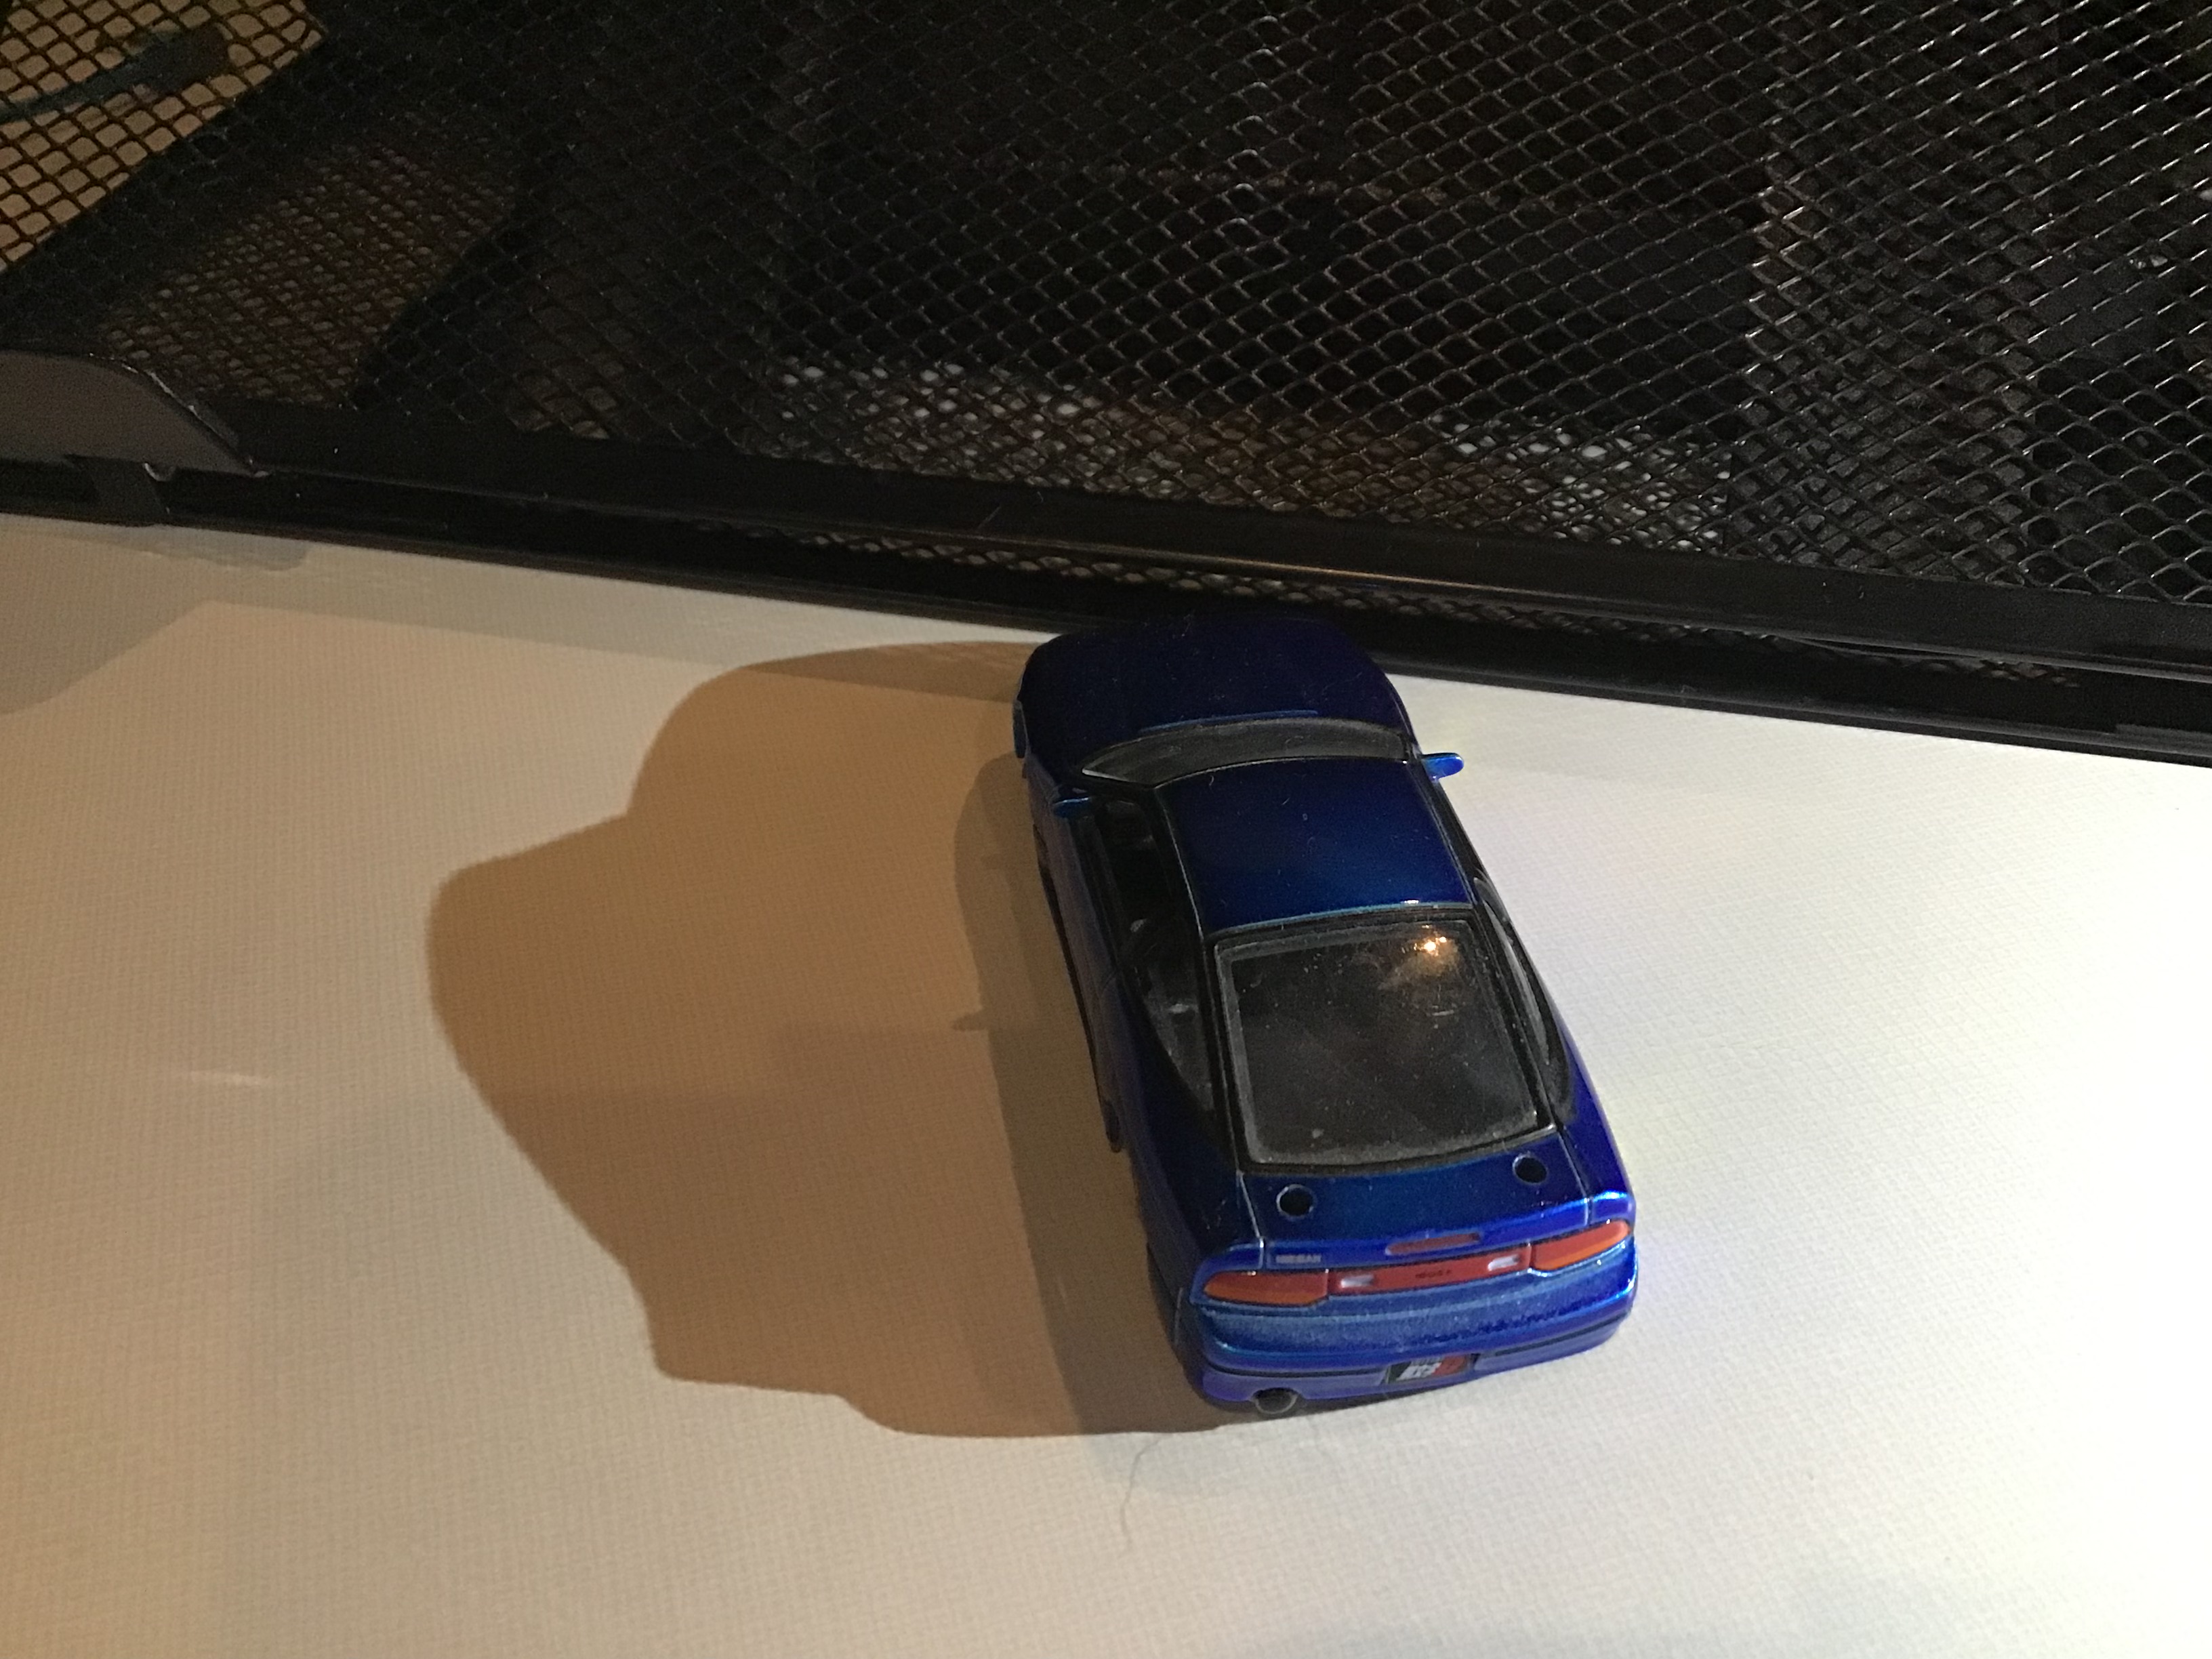
Here's the car from the front. I really liked the shadow in this one, which led me to pick it in my first car study. I just adore the gradation!
Here's a side pic! I wish I would have gotten time to draw it from the side. I really liked this picture, but I liked the one from the back even more, which is why this picture didn't make it.
So those are the images I chose to draw! I hope you enjoy the drawings I did to go along with them! I will keep updating you with my art journey! It's only been a month and I've already learned so much. I'm going to keep on going and try my best!
Thanks for reading! I hope you have a great night!
I've been hard at work learning Unreal Engine and wanted to show you all the progress I've made on my Lego world!
I'm really happy with how this turned out- it was a lot of fun to learn more about Sequencing shots and placing blocks. I am really happy that I've gotten the opportunity to work on levels and stages while I'm here. It's been awesome seeing how things are staged in Unreal Engine!
Anyways, I'm going to show you what I've been working on!
I added to the waterfall and also worked on populating the world with more cacti! I even added an additional platforming section near the end of the world, so there is a little something to do in each part of this world!
Look at all these cacti! I really went overboard with them, but I wanted the world to look like my favorite place- the desert- so I feel that they are appropriate!
I'm happy that a lot of my Sequence shots are a lot smoother now. I'm learning so much about using Unreal and I learn a little more with each project. Very thankful to have this opportunity to learn about something new!
Here's a nice mountain shot. I really love the chalky peaks in this HDRI. It really looks like I'm on a hike in the desert- maybe that's why I focused on this for my project, huh?
Another shot that I'm happy with! I'm so happy that this project turned out the way I wanted. I'm so excited to keep modelling in 3D!
Before I go to keep working at my craft, I'll drop a final beauty shot to leave you with.
Thanks for taking a look at my blog today! I hope you have a great night!
Hey everyone! I hope you've all had a wonderful day!
I've been hard at work with some more portfolio progress. This week, I've had the pleasure of being able to work on value and highlighting in my work.
I was especially thankful for this assignment, particularly because lighting and shading has always been something I've struggled with. As a cartoonist, I usually work with cel shading, so I don't usually pull out all the stops in my drawing.
Today, I made an exception to that rule. I worked entirely in black and white (and all the tints and tones between) and did almost nothing but shading! Woohoo!
Now, let's see what I ended up doing with all of that...
I ended up choosing the Billie Storm Anderson picture because I loved the subject matter... the desert!
I'm homesick, don't judge me!
Homesickness aside, I had a lot of fun with this project! I started to get to the point where I was overly-nitpicking this, which is how I knew I needed to stop. I could work for hours on end on my lighting and stuff- it's definitely a vicious cycle.
Here are all the layers, just to give you an idea of how much is going on in this picture.
Thankfully, I was able to pull away from the drawing and I ended up with a piece I'm really proud of!
But I couldn't do a great job without some great references. Props to the photos below for serving as my project reference!
This one was great because it showed me that the differences in color are subtle when compared at distances. I had initially made my color differences more noticeable, which I promptly changed to make them more subtle.
Here is another great picture of the same rocks, but with some set dressing!
And another picture that helped. I love the way these rocks look!
And last but not least, my favorite picture yet. I've actually been here a lot. I used to hike here!
But yeah, hopefully you liked my picture and also these wonderful references!
I'm sitting here waiting for 6,805 shaders to compile for my lighting homework... So what a perfect time for me to start chipping away at my blog post, huh?
Have a song while you and I both sit here and wait. This soundtrack has been getting me through a lot of homework this weekend and I highly recommend it! When I'm not listening to new wave or 80s music, you'll usually find me listening to VGM of all sorts.
Tangents aside, we're here to talk lighting!
This assignment has been extremely fun, despite some setbacks. While I encountered a lot of errors and issues, I've had a lot of fun "building" this new world of lights! I've been trying hard not to overdo it with the lights, so let me know what you think of my built-out world.
Before I get started on my "dev log" for this post, I wanted to drop some of my light references below.
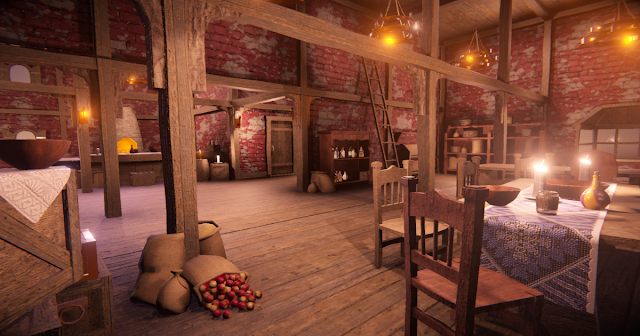
This was the mood I wanted to establish inside of the buildings in the world. I wanted it to feel warm and ambient, with not too much light, but not too little. I wanted fireplaces to emit an orange or amber glow, to give the room a slightly warm feeling.
As for the outside, I wanted it to have a stormy, foggy appearance. Like a visual pea soup, you could say. I wanted the green water to be complemented by the fog, giving the sunlight a unique feel and providing me more opportunities to play with lights! Also, forgive the quality on this image. It was the closest thing I could get to what I wanted for the lighting.
All that aside, let's delve into some of the "rules" of this challenge.
This week's challenge involved learning about parent materials and instances, along with experimenting in different forms of light. I challenged myself to create a sky box and sky light for my Lego challenge, which actually helped me a great deal on this week's assignment! Hooray for Blueprints, the true hero in this whole operation. It's amazing what you can do with them!
So, there were a lot of curveballs thrown my way for this assignment.
For starters, I went to class after working on my assignment all morning... Only to come back with no changes saved whatsoever. After some help from my teacher and peers, we figured out that I was going to have to rebuild from the ground up. And rebuild I did!
It was a setback, but life is all about how you overcome those kinds of things. So I did what I do best, kept working at it.
I actually ended up with better lighting in my second attempt, so I now understand the importance of iteration in all shapes and forms. Even on my second pass, I knew more about the process and was better able to optimize my time. Plus, I learned a great deal about Perforce due to the setbacks, and have now been making sure I update my depot with each save.
Another setback happened later on, as I was working on my material instances. I saved an instance... and BOOM! All of the floors in my houses disappeared, which kind of destroyed all of the lighting I had worked for hours on. I had no way to undo, as I had just saved.
Another setback, another solution... I simply replaced all of the planks using the meshes that came with the initial file. After that was done, I added my spherical reflection pieces to each room and finished adding the instances. Then, I was done...
...Or so I thought.
I had forgotten to update the Lumen and DirectX settings on this new version of the project. Since I had lost my initial save and had to restart on an entirely new one, I had totally blanked on redoing the shaders and lighting. So, after tweaking the settings, I realized that I needed to recompile everything and let Unreal restart.
So, that's where I am now. Letting all of my stuff recompile as I reflect on this project. I made a lot of mistakes this go-around, but I'm honestly really happy with this project. Life is all about making mistakes and learning from them.
And learning I am! I never imagined that I would know about all of these things even just a month ago. 3D, lighting, game engines... All of it was beyond me, as I had no idea of where to start. So the fact that I'm even able to do this at all is incredible to me.
To get back on the subject of lighting, perhaps my favorite part of the assignment was adding in the Skybox. I love the way that environment lighting can impact a scene. Even adding fog made everything feel mystical. It reminded me of Misty Bog from Spyro the Dragon and I loved being able to capture that feel in my own work!
I love being able to add in my own HDRI skyboxes and give the worlds I create a unique feel. I am hoping that I can eventually do this with my own textures and materials. I would love to create a Spyro-esque skybox one day. It would be a dream come true!
Well, I hope you enjoyed reading about my lighting process. Perhaps the hardest part of the assignment was not rebuilding all of the lights or even rebuilding the missing floors.
The hardest part was actually submitting it to Perforce. Perforce is a little scary, but it has helped me a lot, especially after all my lights were poofed away. I definitely learned something about it today... Like, that you can be rest assured that Unreal will save your changes to Perforce, so long as you Mark them For Add and then Submit your change list to the server depot.
2,653 shaders to go and I can finish the rest of this project by submitting it to Perforce! I hope you enjoyed reading about my endeavors, and hopefully, this helped someone out if they've ever struggled with lighting or building out shaders.
It's me again, back with more 3D learning! I've been really using Maya this week, which has given me a lot of practice! I'm so much more confident in myself, as I know what many of the features I can use will help me accomplish. I still have a lot to learn, but I'm more determined than ever to keep moving forward and continue bringing my work to life!
So, this week's assignment was a Lego project, which sounds easy, but it really is no joke. The things I learned in this assignment were much different than the things I learned in the previous (Minecraft) one. While the Minecraft assignment was focused on texturing, this assignment was a different beast entirely.
It was focused on modeling, which was really fun, but kind of painful when you take into account how many pegs a 4x15 Lego has! Pitfall incoming!
Here's a progress shot, where you can see the pitfall I'm about to go into detail about... which is why my displays are still on!
The one pitfall I experienced while working on this project was that I could not figure out how to accurately snap objects to the grid. I would hit the middle mouse button and X, like many hotkey guides suggested, and even just hit X before grabbing an object, but to no avail. I'm thinking that something may be up in my preferences, so I'm going to talk to Nick and some peers to troubleshoot.
So, you know what that means- I placed all of these practically by hand. I was able to group select and drag them, but I had to lay one row of the pegs over another to make sure the sizing and spacing was absolutely correct.
It was painstaking, but I started small with the 2x2s and then worked up to the 4x15 bricks. Once I got there, I was able to really streamline my workflow!
How many pegs are in a Lego? Too many to count, that's for sure! I ended up grouping everything at the end, since I had a lot of overlapping parts due to my snap to grid workaround. That's why my content window is a bit of a hot mess. Trust me, it gets better in the final file! Everything is grouped- otherwise, I wouldn't have been able to export selected into Unreal!
Speaking of Unreal! Here are some of my Prickly Pear cacti in my Lego world. I wanted to get started on my Unreal build, as it helped demonstrate some of the stuff I was trying to sculpt a lot better than Maya. In fact, if you noticed in the video, I built a waterfall in Unreal that did not fit in the staged scene in Maya, so I have provided plenty of pictures of it below!
Notice the sky? I'm glad you did! I actually custom-coded it into unreal with the Blueprints editor! Thanks to HDRI Haven, I was able to get a really nice look to my overall world!
Here's that Blueprint for future reference! This is really helpful for skyboxes in general and provides dynamic lighting. Since it is a sunset scene, it gives my desert a nice, warm feel to it. Like deserts usually are!
There's a nice view of that sunset, complete with some cool looking shadows on my waterfall! Again, this world is far from complete. I want to continue to build onto it. But I was having fun with the platforms and stairs to the right of the world and want to incorporate more things like that as I keep experimenting.
Here's a nice, peaceful sky shot, complete with some shadows and a pretty view of the desert peaks in the distance.
Here's a view of the platforming section and some of the palm trees and cacti. I really like the way they turned out! They add a lot of character to my Lego world!
Here's a nice view of those mountains in the distance and another look at what I'm building out with those platforms! I have the player start here, which gives you a full view of the rest of the level. Then, you can try your hand at the brick platforms!
Here's a bird's eye view of the whole world! I know it's far away, but I wanted you to see the full grid in all of it's brick glory!
Here's a comparison shot in Maya. The staging in this picture looks so cool- the Infinity Wall and lighting really make some cool shadows. It's like being on a stage!
And last but not least, take a gander at this fast-paced flyover. Sequencer can make some really interesting results, especially if you only have a hundred or so frames. I still think it looks cool, but not as dramatic as my initial Bird's Eye clip.
Besides the Snap to Grid setback and a couple minor bugs, this project went well! The only thing that gave me a small hiccup was transferring the Legos to Unreal. It would not give me the option to use an FBX file, stating that these were "advanced assets" that could not be exported. I instead exported them as OBJ files, which worked well.
The only downside to that was having to delete the material off of them if I wanted to reimport them into Maya. I was able to over come that, but I would like to know the root of the problem for next time. Again, this is going to have to be something I consult my peers on.
But yeah, this is my Lego world! I hope you enjoyed the ride- I really worked hard on this and was extremely happy with the result! This project ended up looking really nice and I'm so happy I was able to work on it!
I'll be back here next week to deliver the final installment of this two-week Lego project!

.png)
.png)


.png)


.png)
.png)
.png)
.png)
.png)
.png)

.png)


.jpg)